Contrary to popular belief, motion needs a certain level of blur to appear realistic. It is a result of how we experience motion in the outside environment. Our eyes perceive continuous motion, and everything moving swiftly appears to us as a blur.
STEP 1: Set Up Your Project
Create a project which contains elements you’d like to apply a motion blur to. Drag video clips recorded with a high shutter speed to the timeline, or create moving text or moving graphics with Track Motion.
STEP 2: Set Motion Blur Type
✓ Click the Project Properties button in the main toolbar.
✓ In the Project Properties window, click the Motion Blur Type drop-down menu. Most often, the motion blur should be the default selection of Gaussian, but you can experiment with different types of blurs.
STEP 3: Open Video Bus Track
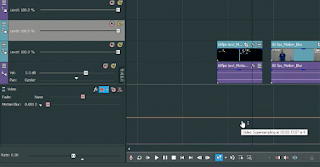
You apply motion blur with the Motion Blur Amount envelope. The envelope is a feature of the Video Bus Track.
✓ Go to View>Video Bus Track to make the Video Bus Track visible, or press CTRL+SHFT+B.
The Video Bus Track affects all video in the project, so any motion blur you apply will affect all of the video, but you can bypass the motion blur for any video on an entire track.
✓ In the video track’s header, click the hamburger menu. Select Bypass Motion Blur. The motion blur will then not apply to any video in that track, so you can separate out any video which you don’t want
STEP 4: Insert Motion Blur Amount Envelope
✓ Right-click on the Video Bus Track header and choose Insert/Remove Envelope>Motion Blur Amount. A magenta envelope line appears across the bottom of the track.
STEP 5: Set Motion Blur Amount
✓ Hover the mouse cursor over the point at the beginning of the envelope until its details appear. The motion blur amount is expressed as a length in timecode, starting at 00:00:00.00.
✓ Drag the point to raise it, and the length increases by a number of frames, from .00 to 1.00. At 1.00, a length of a full second, the motion blur is extreme. Often, your motion blur is best achieved at values of only a few frames, like 00.04.
If you drag the entire envelope, or change only the point at the beginning the envelope, the motion blur amount stays the same throughout the entire program.
✓ If you want it to vary, right-click the envelope to add points along it, then raise or lower those points as needed. You can also automate the motion blur effect, recording your changes as the timeline plays.
STEP 6: Supersampling
Sometimes, motion blur will produce unwanted results, like repeated or ghosted images within frames. You can alleviate this somewhat using supersampling, which interpolates and creates extra frames between the project’s frame rate, reducing ghosted images. Sometimes, supersampling by itself can achieve a desired motion blur effect.
Like motion blur, supersampling is a function of the Video Bus Track.
✓ Right-click the track header, and choose Insert/Remove Envelope>Video Supersampling. An orange line appears in the track. Like the motion blur envelope, you can left-click on the envelope and drag the entire line up and down to set supersampling for the entire project, or you can right-click the envelope and add points for changes throughout the program. Supersampling values range from 1 to 8, with 8 having the highest effect.


